
Welcome to our blog
Recent Posts


What to wear to your engagement session
Here is our general advice on what to wear for your engagement session. Remember and engagement shoot is all about you and your style so no matter what make sure you love what you choose.
An engagement portrait session is a special milestone in a couple’s celebration of getting married. It’s an opportunity for the couple to capture their love for each other and celebrate their upcoming life together. Choosing the right outfits for an engagement portrait session can make a huge difference in the overall quality of the photos. Here are some tips on the best things to wear for an engagement portrait session.


Dress appropriately for the location
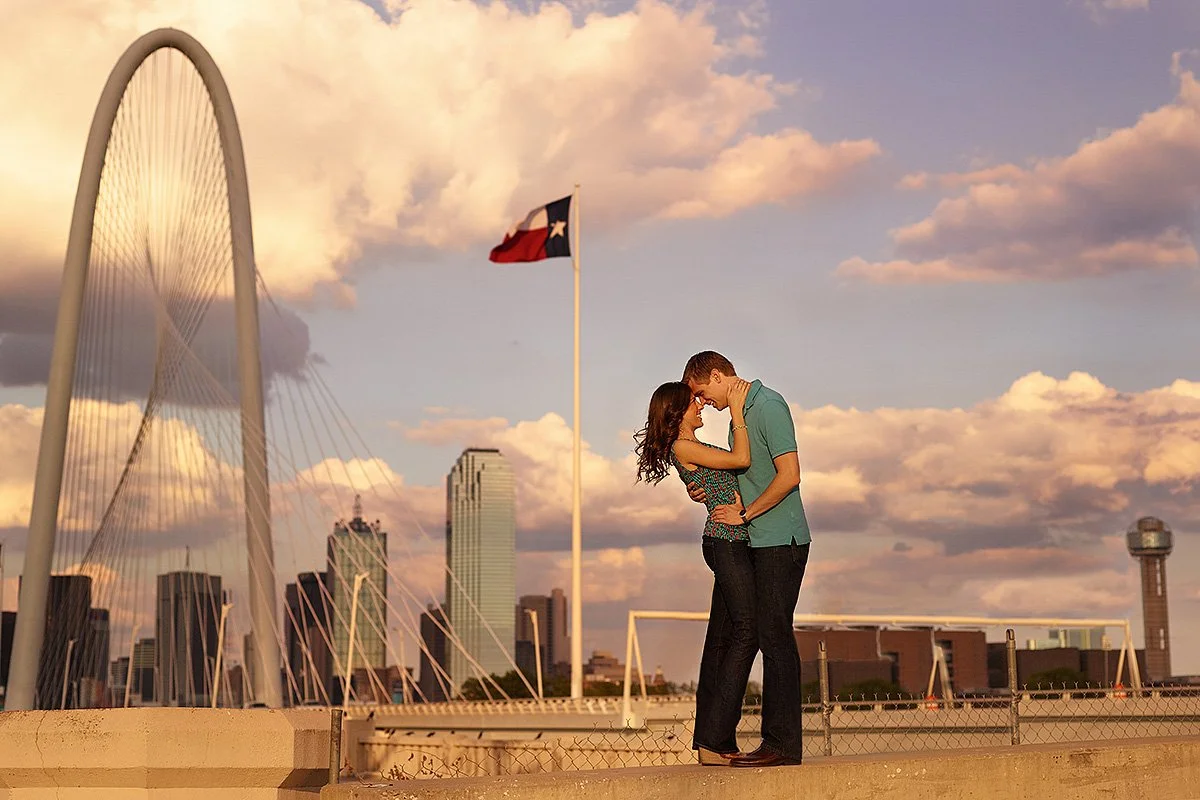
One of the most important things to consider when choosing outfits for an engagement portrait session is the location of the shoot. Are you planning on taking photos in a park, on the beach, or in a cityscape? Different locations may call for different styles of clothing. For example, if you’re taking photos on the beach, you may want to wear lighter, flowy clothing that will catch the breeze and create beautiful movement in your photos. If you’re taking photos in a cityscape, you may want to wear more structured clothing that will contrast with the urban surroundings.
One other tip we give everyone is to err on the side of being too dressed up rather than too casual OR bring two outfits and let us shoot both of them to give you a more diverse set of images.
Wear coordinating, not matching, outfits
This means choosing outfits that complement each other without being too matchy-matchy. For example, if your partner is wearing a navy suit, you could wear a dress with navy accents or a complementary color like burgundy or blush. This will create a cohesive look without being too uniform. If you’re not comfortable picking complimentary colors please ask us, we’d love to help. We would just need to know at least one color you’re sure about and we can easily help with the pallet to compliment.
Consider the season and weather
The season and weather can play a big role in what you wear for your engagement photos. If you’re taking photos in the summer, you may want to wear lighter clothing and avoid heavy fabrics like wool or velvet. If you’re taking photos in the winter, you may want to wear warmer clothing and consider layering to stay comfortable. Also, consider the weather forecast for the day of the shoot and plan accordingly.
Dress to your body type
When choosing outfits for your engagement photos, it’s important to dress for your body type. Choose clothing that flatters your shape and makes you feel confident. If you’re not sure what styles flatter your body type, consider consulting with a stylist or shopping with a friend who has a good eye for fashion.
Avoid busy patterns and logos
While bold prints and logos may be trendy, they can be distracting in engagement photos. Instead, opt for simpler, solid-colored clothing that will put the focus on you and your partner. If you do want to wear a pattern, choose one that is subtle and not too busy.
Accessorize wisely
Accessories can add a lot to an outfit, but it’s important to choose them wisely for your engagement photos. Avoid wearing too many accessories, which can be overwhelming in photos. Instead, choose one or two statement pieces that will add interest to your outfit without taking away from the overall look.
Dress for your personal style
Your engagement photos are a reflection of your personalities and your relationship, so it’s important to choose outfits that reflect your personal style. If you’re more casual and laid-back, you may want to wear jeans and a nice top for your photos. If you’re more formal and elegant, you may want to wear a cocktail dress or suit. Whatever you choose, make sure it feels true to who you are as a couple.
Consider the color palette
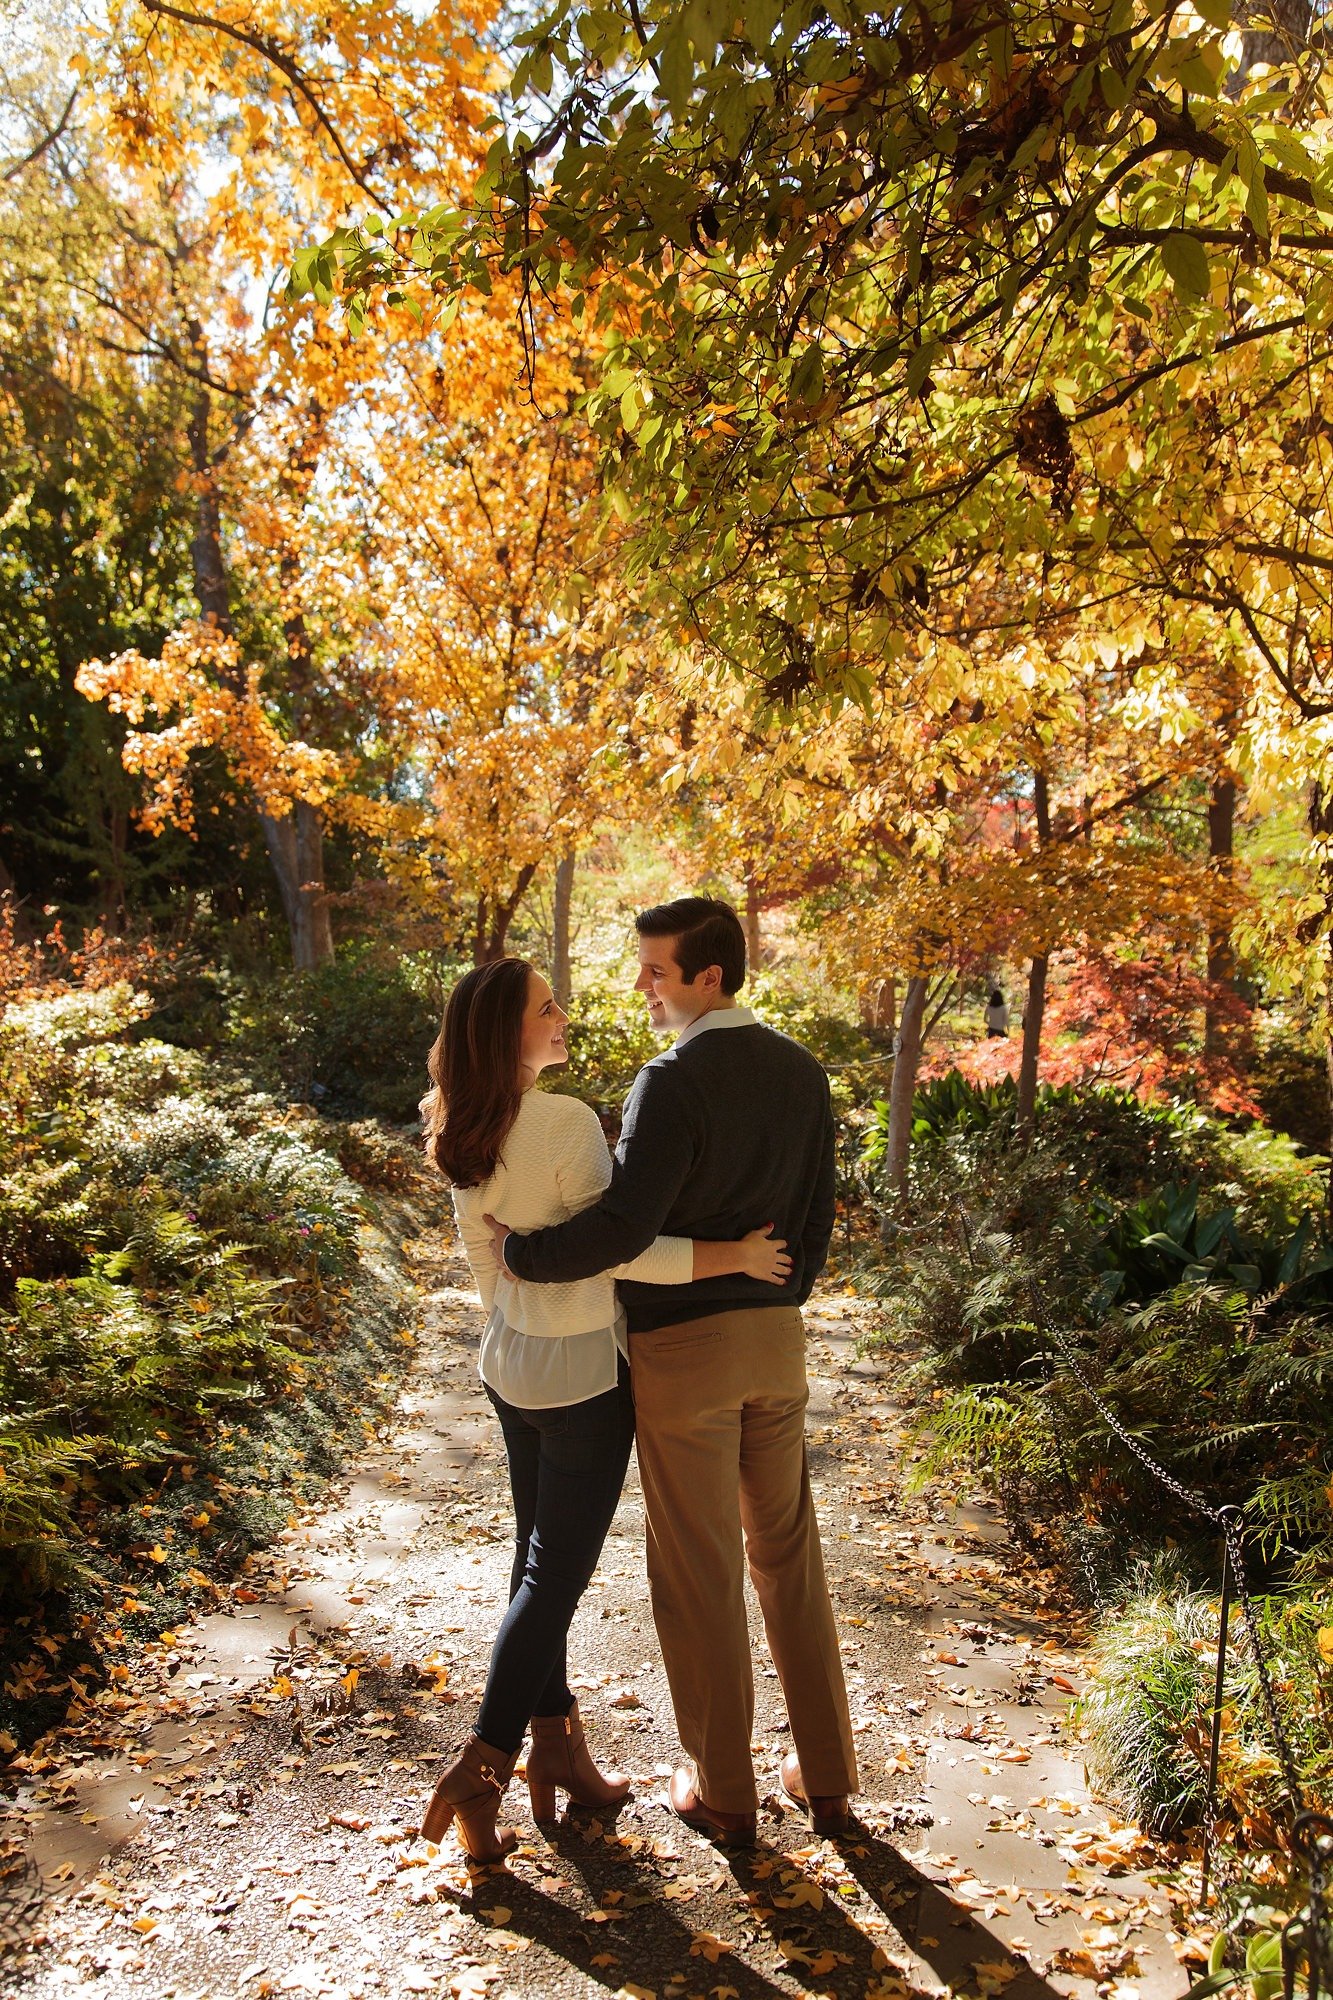
Choosing a color palette for your engagement photos can help create a cohesive look. Consider the location and the season when choosing your colors. For example, if you’re taking photos in the fall, you may want to choose warm colors like rust, mustard, and burgundy. If you’re taking photos on the beach, you may want to choose cool colors like blues and greens.

How you can get the perfect wedding reception lighting
This post is about how the various choices couples have in the look of the lighting in their reception venues. We go over the look and feel of pin spots, up-iights, gobos and outdoor lighting.
I wanted to write this article for two reasons; First, I’d love to answer a question I get from couples planning their weddings about the impact of the lighting options they have for their reception. Namely how up-lights, pin spots and gobos impact the look of a room in photographs. Second, I wanted to have a discussion about how we approach using our various lights to enhance your wedding reception photos without ruining the ambiance you’ve carefully designed.TLDR: The type of lighting you choose for your reception will have a huge impact on the look and feel of the space. Who you choose to do the photography and video also has a big influence on the look/feel in photos. We work hard to keep your space looking as you intended in your photos, which might be light and airy at an outdoor wedding or it could be dark and romantic in a downtown ballroom at night. Side note: the video team you choose can also have a big impact on the lighting experienced at your reception than what you might expect so ask our advice is to ask questions about during the interview process.First let’s take a look at three photos representing the three types of ballroom lights we see at receptions most often:
Up-LightingThis room has beautiful amber up-lighting which you can see clearly along the back wall between the windows. This type of lighting adds a lot of dimension to a room and looks so much more alive than when it’s left bare. Up-lights come in every color and can often be changed later in the evening to another hue for dancing. Also note, the chandelier in this room contains lights that are illuminating the three large florals on the head table.
Pin SpotsAt this reception in the ballroom at The Ritz Carlton Dallas we had both up-lighting and pin spots which highlight each of the florals in the center of every table. The combination of up-lights and pin spots really adds a lot of pop to the room and draws attention to the beauty and color of the centerpieces. Note that while the room is currently using it’s chandeliers, those were turned off for dinner and dancing making the light more dramatic.
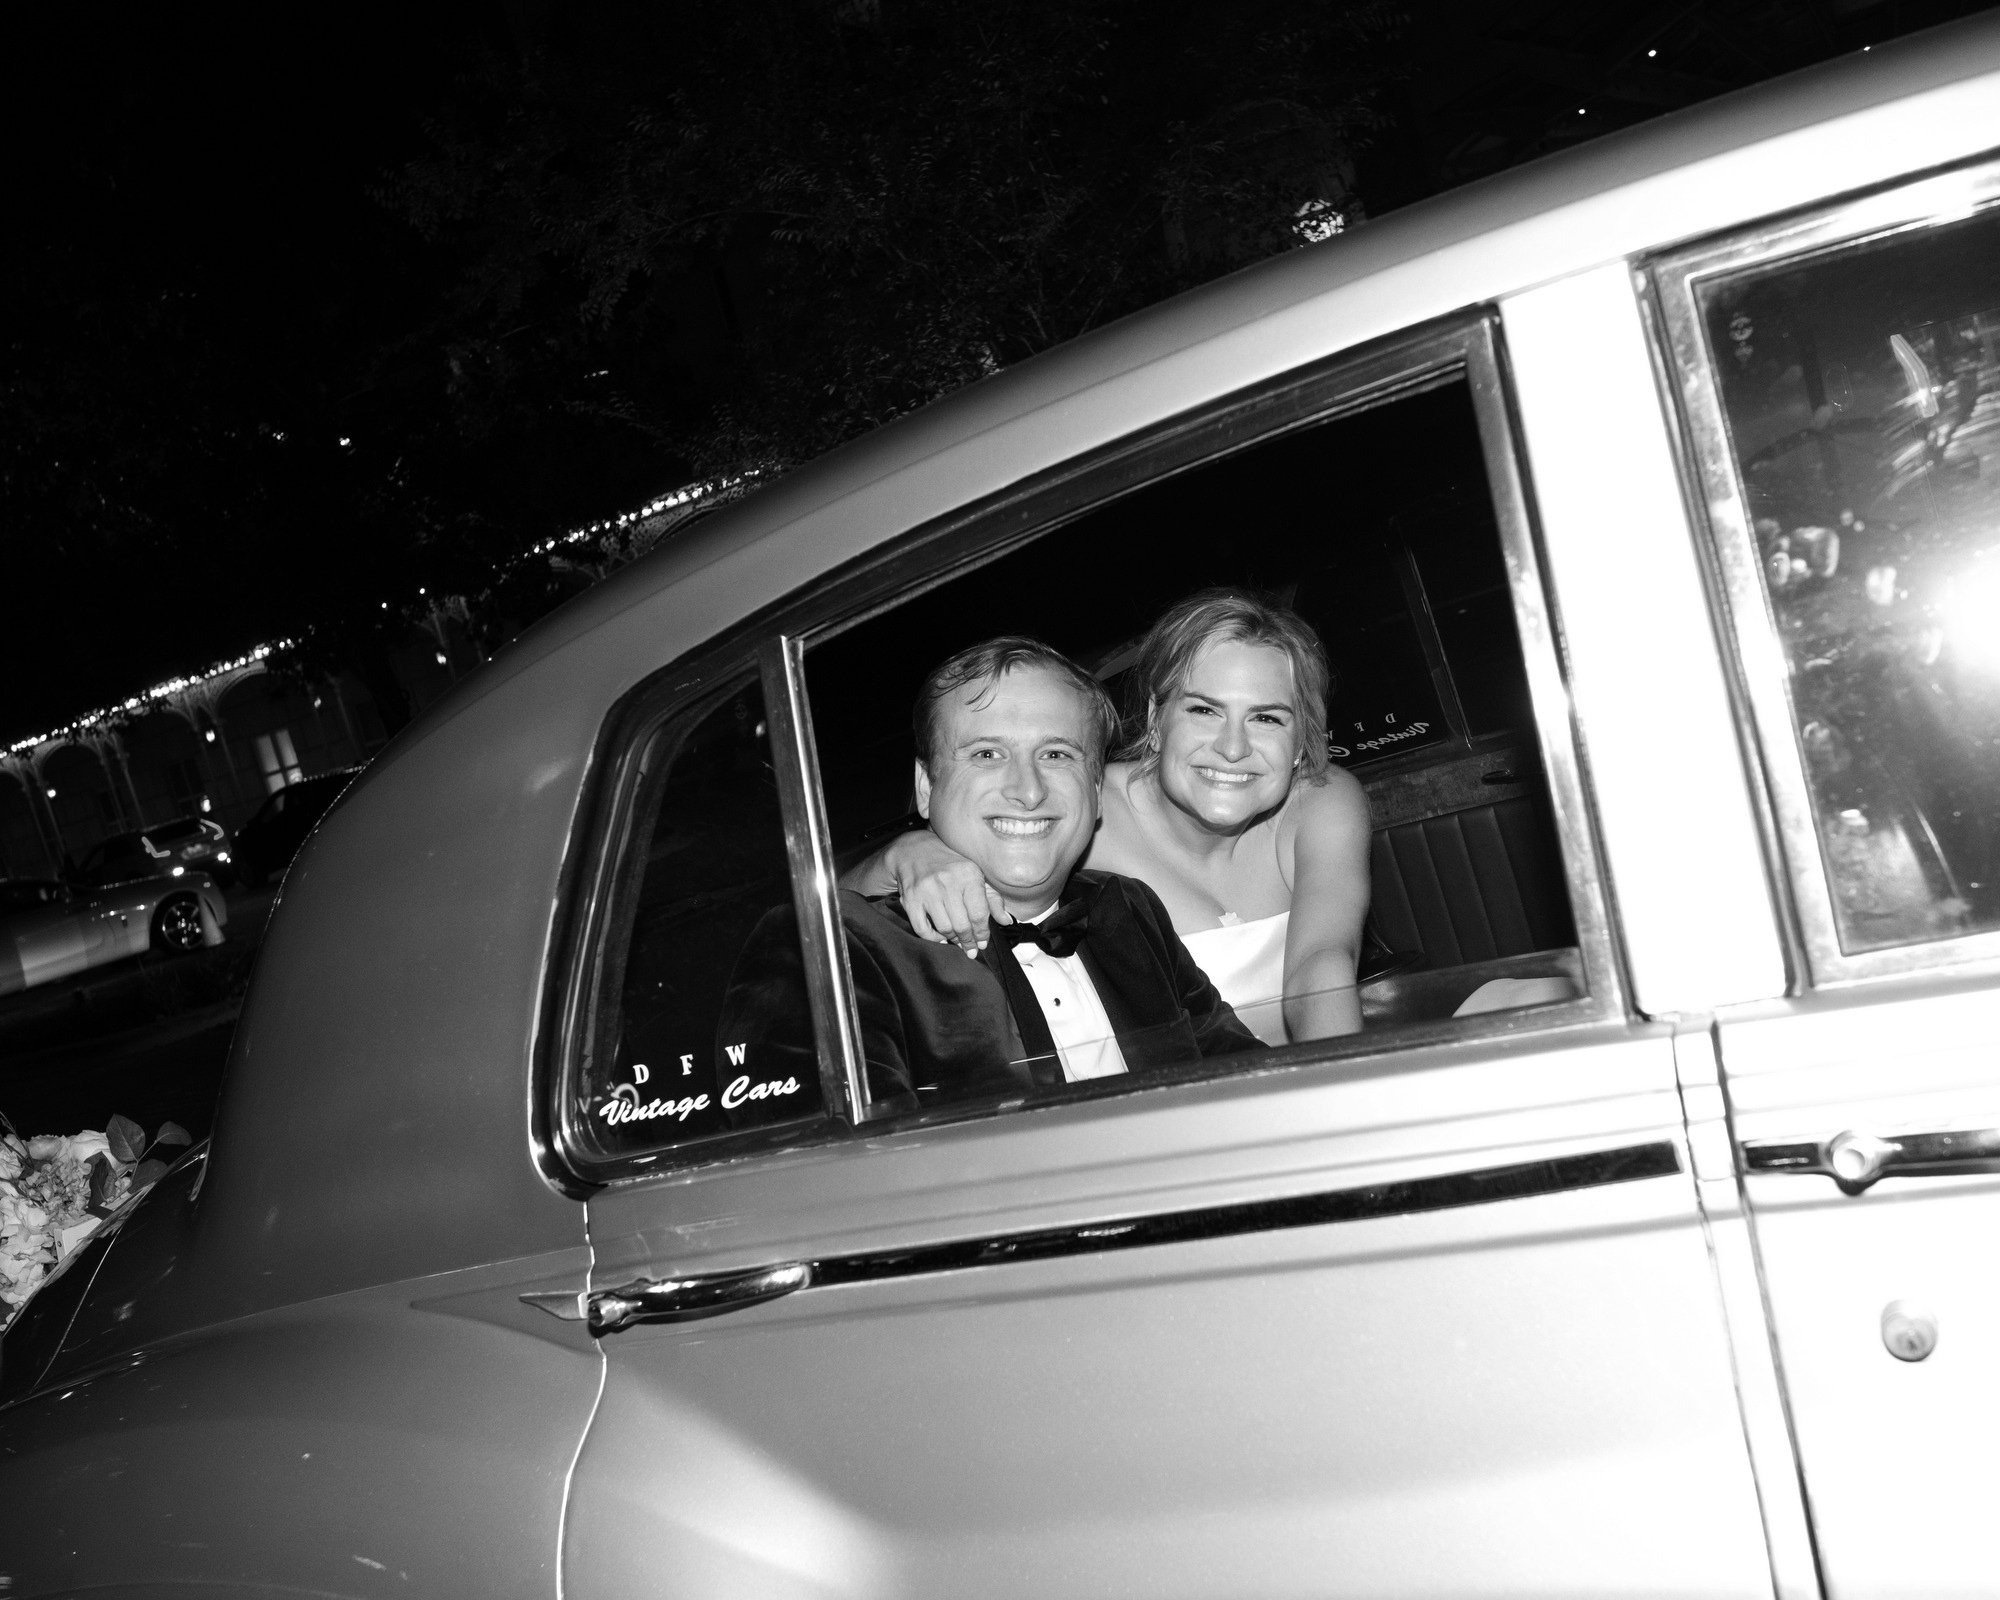
GobosWhat I wanted to highlight here was the use of gobos to add the pattern to the ceiling of Union Station in Dallas. This type of light is commonly used on ceilings, accent walls, and dancefloors. When you’re working with a a large space, like this one, the gobo adds a lot of ambiance to the room.Ok, now with that preamble about the types of lights out of the way, let’s talk about how we try to preserve these lighting cues during a reception. We really feel like it’s important not to destroy what you and your design team have done, but at the same time, we want to use our skills to highlight and enhance your images.Below: In this image, the only light I added was small bounce coming from my on camera flash. The band and the video team had spotlights on the couple, including the light coming from the sign, so this was already a bright scene and not too much had to be done to get a great result. I love that it feels natural to the moment, although, I want to illustrate that video and entertainment can also have an impact on the final images so it would be best to talk to them during the design process.
Here is an example of where I did have to add lighting to a first dance. There are two flashes being used here, one on each side of the dance floor, but they have been set up so that they are not overpowering the gobo on the floor or the chandelier. This setup is critical to maintaining the feeling of the space and adding the beautiful highlight to the brides face.
This last dance is an example of how creative use of light can enhance a dark scene without destroying the mood of this private last dance. In this case, a single light was added from behind the DJ booth to give a rim light to the couple. If we had used a bounce flash here, the candles and string lights would be washed out and the room would most likely have rendered too bright.
Here is an example at Arlington Hall where the couple is singing with the band on stage. Again, knowing when you need light and when you don’t is everything, I love the color and mood of what was existing.
Below pictured here at The Four Seasons the video team had two lights pointed at the dancefloor (outer two lights) and the band had two strip lights (inner lights) also illuminating the couple – net result – no flash needed but I could have had the same look if I had used strobes in either of those positions instead of constant lights.
Lastly below we see what some simple string lights can do to a tent. I wait until way after dark to attempt this image and I love how we were able to capture the couple dancing under the stars.
OK so to sum up here are my key takeaways –The light you choose for your venue can have a huge impact on the overall feeling of the room. It’s really good to think about up-lighting, pin spots and gobos in your overall design.When photographing your design, we really attempt to keep the overall look and feel of your space in the images. We could easily overpower the lighting in a dark and romantic setting but that would make your images look inconsistent with the design (and at worst over-flashed, like you’re in a gym).Video also needs to bring in lights for a reception and those lights are on and visible to your guests all night. Talk to them about their approach and try to coordinate that with the other parts of your team.
I hope that helps! Please write or call if you have any questions-we’re here to help! You can always reach us via ph/txt 214-497-7159 or email at stephanie@josephmark.com
Wedding Day Timeline Advice For Photography
This is advice from us as experienced wedding photographers on how to develop a wedding day timeline that allows for the best photographs on your wedding day. We go over how much time is needed during each part of the day and also who needs to be ready and when.
Here are two sample timelines we like for group images at weddings with and without a first look and below are five pieces of advice on how to handle group photos on your wedding day. I know there is a lot to think about but we hope this article helps you with a few ideas which will cut down on any stress you have and make your wedding day that much more stress-free and fun. If you have questions always feel free to contact us and we’ll be happy to help.Traditional Photo Timeline – No First Look
(We chose a 5p ceremony time just for the example)
2:30 – 3:00 Hair and makeup finished (plan 2:30 finish to give a 30 buffer just in case they're running behind)3:00 – 3:30 Bride’s dressing (father-daughter first look, mom needs to be fully dressed)3:30 – 4:00 Portraits of bride and bridesmaids + bride’s immediate family and grandparents4:00 – 4:30 Groom and Groomsmen + Grooms immediate family and possibly grandparents4:30 – 5:00 Resting before the ceremony (guest arrival at this time)5:00 – 5:45 Ceremony5:45 – 6:15 After ceremony group photos6:15 – 6:30 Photos of bride and groom ( this is just 15 minutes but it’s often necessary to move quick at this time because your guests are already at the cocktail hour and everyone wants to get the party started)

First Look Photo Timeline
(We chose a 5p ceremony time just for the example)
2:00 Hair and makeup finished (leave some buffer time here just in case you need it)2:30 – 3:00 Bride + Groom get dressed (first look father of bride, mom needs to be fully dressed)3:00 – 3:30 First look/ Photos of bride and groom alone3:30 – 4:00 Wedding party photos with both bridesmaids and groomsmen4:00 – 4:30 Immediate Family Group Photos (mom/dad/sibilings/spouses/nieces/nephews -usually at ceremony space)4:30 – 5:00 Resting before the ceremony (guest arrival)5:00p – 5:45 Ceremony5:45 – 6:00 After ceremony group photos (this is usually includes photographing immediate with extended family in large groups and grandparents with bride and groom)5:45 – 6:00 Photos of just bride and groom in better light if we’re near sunset if not we'll wait and ask you if you want to sneak out of your reception when the light in perfect (10 minutes)

Our Advice To Make The Day Easy
If you want to cut down on the time it takes after your wedding for group photos we recommend photographing as many groups as possible before the ceremony. This is pretty standard for most weddings today but it’s still great advice and it will eliminate the hour-long group photo session after a ceremony. We try as often as possible to photograph not just the wedding party but also parents, siblings, and even grandparents ahead of the ceremony if possible. Afterwards, that leaves just groups like extended family and images where both of you are needed in the same image (if you didn’t do first look).We recommend starting group photos 1.5 hours before your ceremony or 2 hours before if you’re going to do first look. All groups should be finished 30 minutes before the ceremony begins to allow time for guests to get seated.We strongly recommend that the women have their photos done first so that the bride isn’t out and around when guests arrive but also because it gives more time to relax and prepare for the ceremony afterward. This little change can make you so much less stressed on the day because if you’re running behind schedule for any reason having time to make adjustments is critical.Even if we have to move the groom and groomsmen photos to after the ceremony or during the last 30 minutes before the ceremony we want the bride to be able to get her photos done and still have time to relax before heading down the aisle. If the ladies were to go second and there was a delay we really have no options other than to push until after the ceremony which can ripple the timeline and cause the wedding party to be delayed getting to the reception or we have to cut out images she really wants. Being on time for your photos is really critical for a stress-free wedding day which is why we try to help as much as possible both on the day of the wedding and during planning.If you’re going to do a first look we recommend doing that 2 hours before the ceremony, which sounds like a lot but that gives just 30 minutes for that moment and a few portraits of you and your groom, 30 minutes for wedding party photos and 30 minutes for family photos before our deadline to be finished with all groups 30 minutes before the ceremony. Depending on the venue and time of year we sometimes even extend that to 2.5+ hours before the ceremony to give more time for moving around and/or weather concerns. If there is transportation involved like from a hotel to a venue you’ll have to account for that time too and just know that if it takes 15 minutes to do something by yourself it takes twice as long for a bus with a wedding party at a minimum.If you want amazing images of yourselves at sunset, then you’ll need to plan that time into your schedule separately from your group images depending on when sunset falls in your wedding day timeline. Now, this is where it can get a little tricky. You have to know your venue.
If you’re in a big open area like with a barn wedding or a country club you can typically wait longer, maybe even close or slightly after actual sunset to make images. Just after sunset for a very short period, the light is gorgeous and soft since it’s just the sky lighting you without the sun to create harsh light.On the other hand, if you’re in an area with buildings like a downtown setting and there’s lots of shade if you wait too long to go out it will just be dark and flat feeling outside. In those cases, you would want to be out 30 minutes or an hour before sunset to get the best light.
BONUS: The #1 thing can put your pre-wedding timeline behind is hair and makeup. Please plan with your MUA to be done with your hair and makeup well before you need to get dressed to give buffer time in case you need to make changes or if they’re just running behind. If you plan to be finished say 30-45 minutes before dressing, you’ll be so much less stressed, and you’ll have time to make adjustments if needed. Many of the MUA s we work with are real pros but there are always times when things need adjustment and that takes time, so give them time just in case you need it.BONUS 2: We love taking our clients out at night to make a few special images of them in a different setting than where the ceremony took place. We’ll scout ahead of time and plan our lighting ideas so that when we ask them to leave the party, it’s usually just for 5-10 minutes but that’s when we can be creative with stars, the city at night or anything creative we can find at the venue. It’s become something we’re known to do and it often yields the favorite portraits of the day.
Our basic list of group images:
Before Ceremony:
Bride & Groom (right after first look)Bride aloneBride and bridesmaidsBride with each bridesmaid/flower girl/house partyGroom aloneGroom and groomsmenGroom with each groomsmen/usherBride with parentsBride with immediate family (mom/dad/siblings/spouces/nieces/nephews)Groom with parentsGroom with immediate family (mom/dad/siblings/spouces/nieces/nephews)Bride with siblingsGroom with siblings
After Ceremony:
Bride/Groom and groom with officiantBride/Groom with Bride’s Brides Parents*Bride/Groom with Bride’s Immediate Family*Bride/Groom with bride’s extended family mom’s sideBride with bride’s extended family dad’s sideBride/Groom with bride’s grandparentsBride/Groom with Groom’s parents*Bride and Groom with Groom’s immediate family*Bride/Groom groom’s extended family mom’s sideBride/Groom groom’s extended family dad’s sideBride/Groom with groom’s grandparentsWedding Party All*Bride and groom alone (if needed)
NOTE: * denotes portraits that can be done ahead of the ceremony if you decide to do a first look
Have more questions, give us a shout anytime.
Best,